Brodez le motif selon la grille, les piqûres du bord inclus. Coupez avec
environ 1 cm de marge autour du cadre. Coupez une rectangle de tissu du même taille que le motif plus environ 1 cm. Préparez également une rectangle de feutrine plus petit que le motif brodé, une petite corde/ruban et un bouton.
 Stitch
the motif according to the design, including the
stitching around the whole motif. Cut around leaving 1 cm of
margin on the outside for the assembly. Cut a rectangle of fabric the same
size as the stitched square plus 1 cm. Prepare also a rectangle of felt smaller than the stitched motif, a cord/ribbon and a button.
Stitch
the motif according to the design, including the
stitching around the whole motif. Cut around leaving 1 cm of
margin on the outside for the assembly. Cut a rectangle of fabric the same
size as the stitched square plus 1 cm. Prepare also a rectangle of felt smaller than the stitched motif, a cord/ribbon and a button.
Borduur het hele motief zoals aangegeven op het patroon, evenals de
steken rondom het gehele motief. Knip ze uit met een rand van
ongeveer 1 cm voor het inelkaar zetten. Knip ook een rechthoek uit stof
met dezelfde grootte als het motief plus ongeveer 1 cm. Leg ook klaar: een rechthoek van vilt kleiner dan het borduurwerk, een koordje/lintje en een knoop.
 Pliez les
rebords autour du motif le long de la ligne et marquer le pli. Pliez les
rebords du tissu assorti également jusqu'à la même taille que le rectangle brodé.
Pliez les
rebords autour du motif le long de la ligne et marquer le pli. Pliez les
rebords du tissu assorti également jusqu'à la même taille que le rectangle brodé.
Fold the borders around the design along the line and mark them. Fold
the borders of the assorted fabric as well until it has the same size as
the embroidered square.
Vouw de randjes om rond het motief langs de lijn en strijk ze. Vouw de
randen van de bijpassende stof ook om tot het dezelfde grootte heeft als
het geborduurde vierkant.

Préparez une aiguillée de fil avec 1 ou 2 brins. Faire un nœud au bout du fil. Assemblez les rebords des 2 rectangles en passant votre aiguille, de haut en bas, par dessous puis par dessus les points de piqûres. Réalisez de petits points, à une cote par passer à travers la toile et à l'autre cote par passer en dessous de la piqûre du cadre, en gardant une tension dans le fil sans pour autant trop le tendre. Poursuivre à l'angle et continuez d'assembler les 2 rectangles.
Prepare a needle with 1 or 2 strands of thread. Make a knot at the end. Assemble the 2 rectangles by passing the needle down, under the stitch, through the fabric and then over to the next stitches. Make these stitches while going through the fabric on one side and going under the borderstitch on the other side, while keeping some tension on the thread, but not too much. Continue in the corners and go on to stitch the 2 rectangles together.
Zorg dat je een naald hebt met 1 of 2 draden. Maak een knoopje aan het uiteinde.
Naai
de 2 vierkanten samen door de naald van boven naar beneden onder de
randsteek en door de stof steken en vervolgens over die steken naar de
andere kant te
bewegen. Maak deze steken door aan de ene kant door de stof te steken en
aan de andere kant onder de randsteek te gaan, terwijl je
spanning op de draad houdt, maar niet teveel. Ga door in de hoeken en blijf de 2 vierkanten samen naaien.
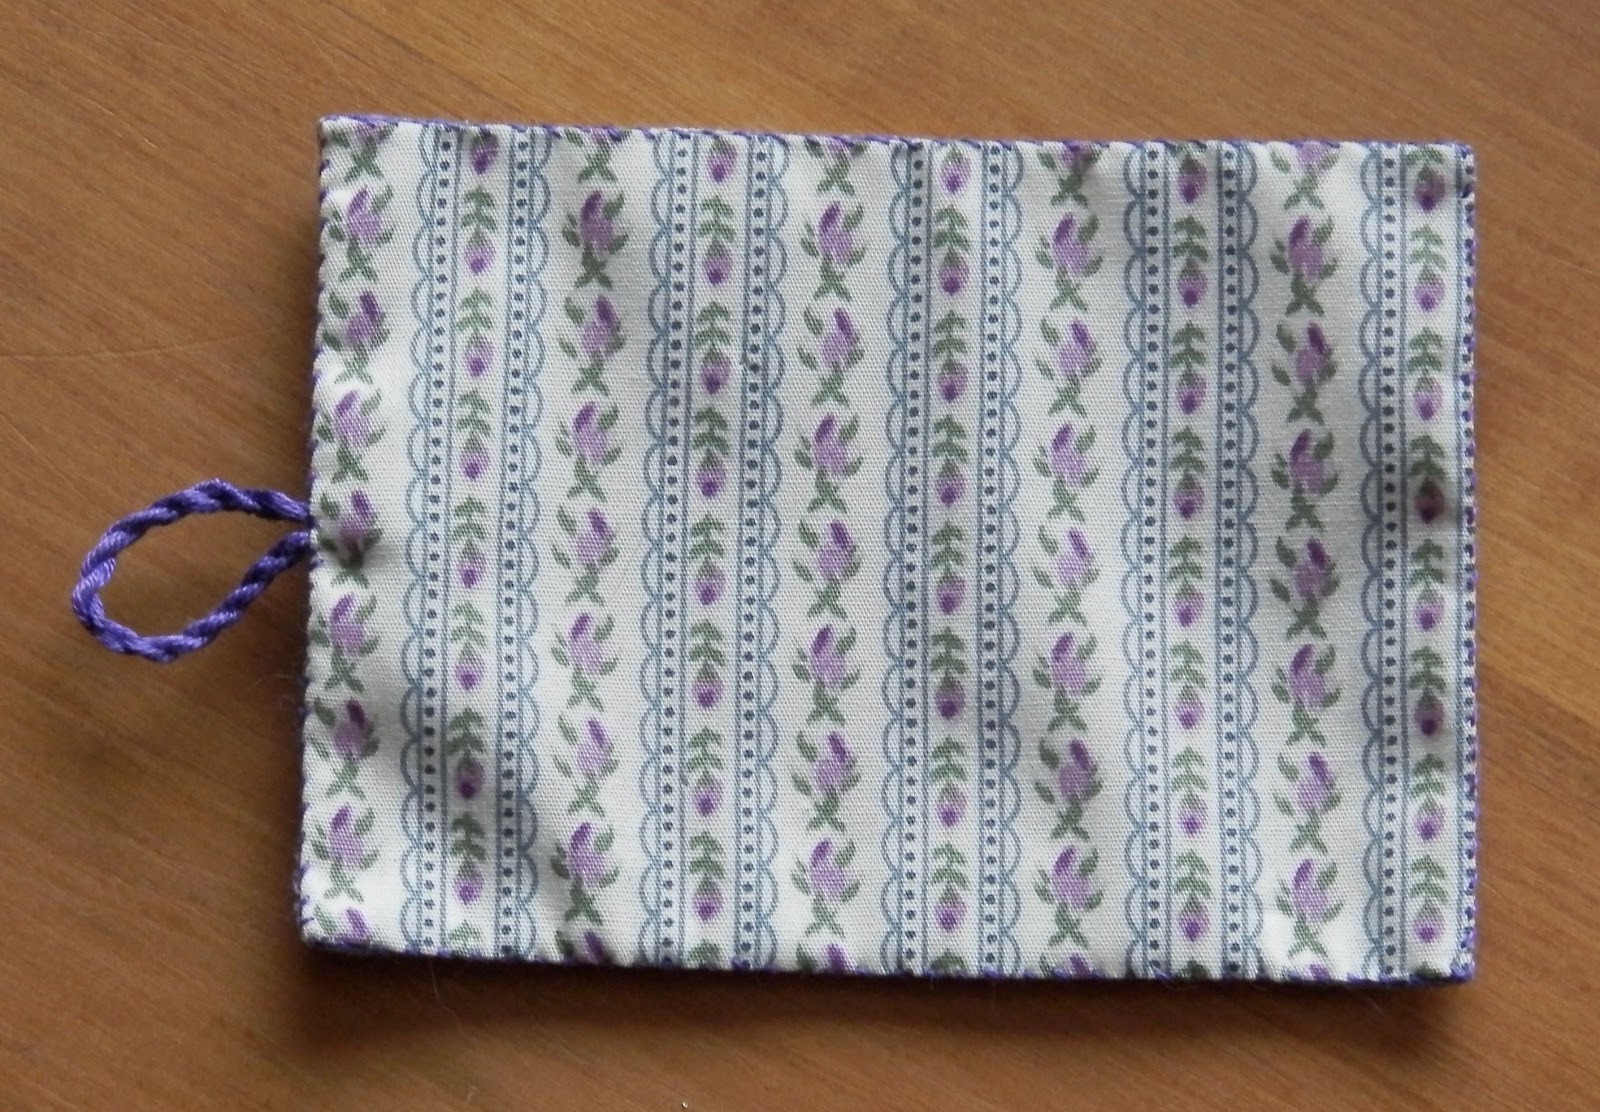
Don't forget to put the cord/ribbon in one of the short sides.
Vergeet niet in een van de korte kanten het koordje/lintje in te voegen.

Après d'avoir fini la fermeture, cachez le nœud. Puis attacher le bouton à l'extérieur, au milieu du coté court opposé de la corde/du ruban.
After having finished closing, hide the end knot. Then attach the button on the outside, in the middle of the short side opposite the cord/ribbon.
Nadat het geheel gesloten is, verberg de eindknoop. Maak dan het knoopje aan de buitenkant vast, in het midden van de korte kant aan de overkant van het koordje/lintje.

Mettez votre pièce de feutrine au milieu à l’intérieur et attachez-le avec des petites piqures au milieu, de haut en bas. Le résultat sera comme un petit livre avec deux feuilles de feutrine.
Lay your piece of felt in the middle on the inside and attach it with little stitches in the middle, from top to bottom. The result should be like a little book with two leaves of felt.
Leg je stukje vilt in het midden aan de binnenkant en bevestig dit met kleine steekje in het midden, van boven naar beneden. Het resultaat is als een boekje met twee vilten bladzijden.

Piquez des aiguilles dans les feuilles de feutrine.
Pliez le livre au milieu et attachez la corde au bouton.
You can now prick you needles in the felt leaves.
Fold it in the middle and attach the cord to the button.
Je kunt nu jouw naalden in de vilten bladzijden steken.
Vouw dan het geheel dubbel in het midden en maak het koordje vast met de knoop.
Merci pour ce tuto très joli et très utile
RépondreSupprimerMerci pour ce tuto très joli et très utile
RépondreSupprimerCe commentaire a été supprimé par l'auteur.
Supprimer